Importing Your ROS 2 Data Into Foxglove Data Platform
 Esther Weon ·
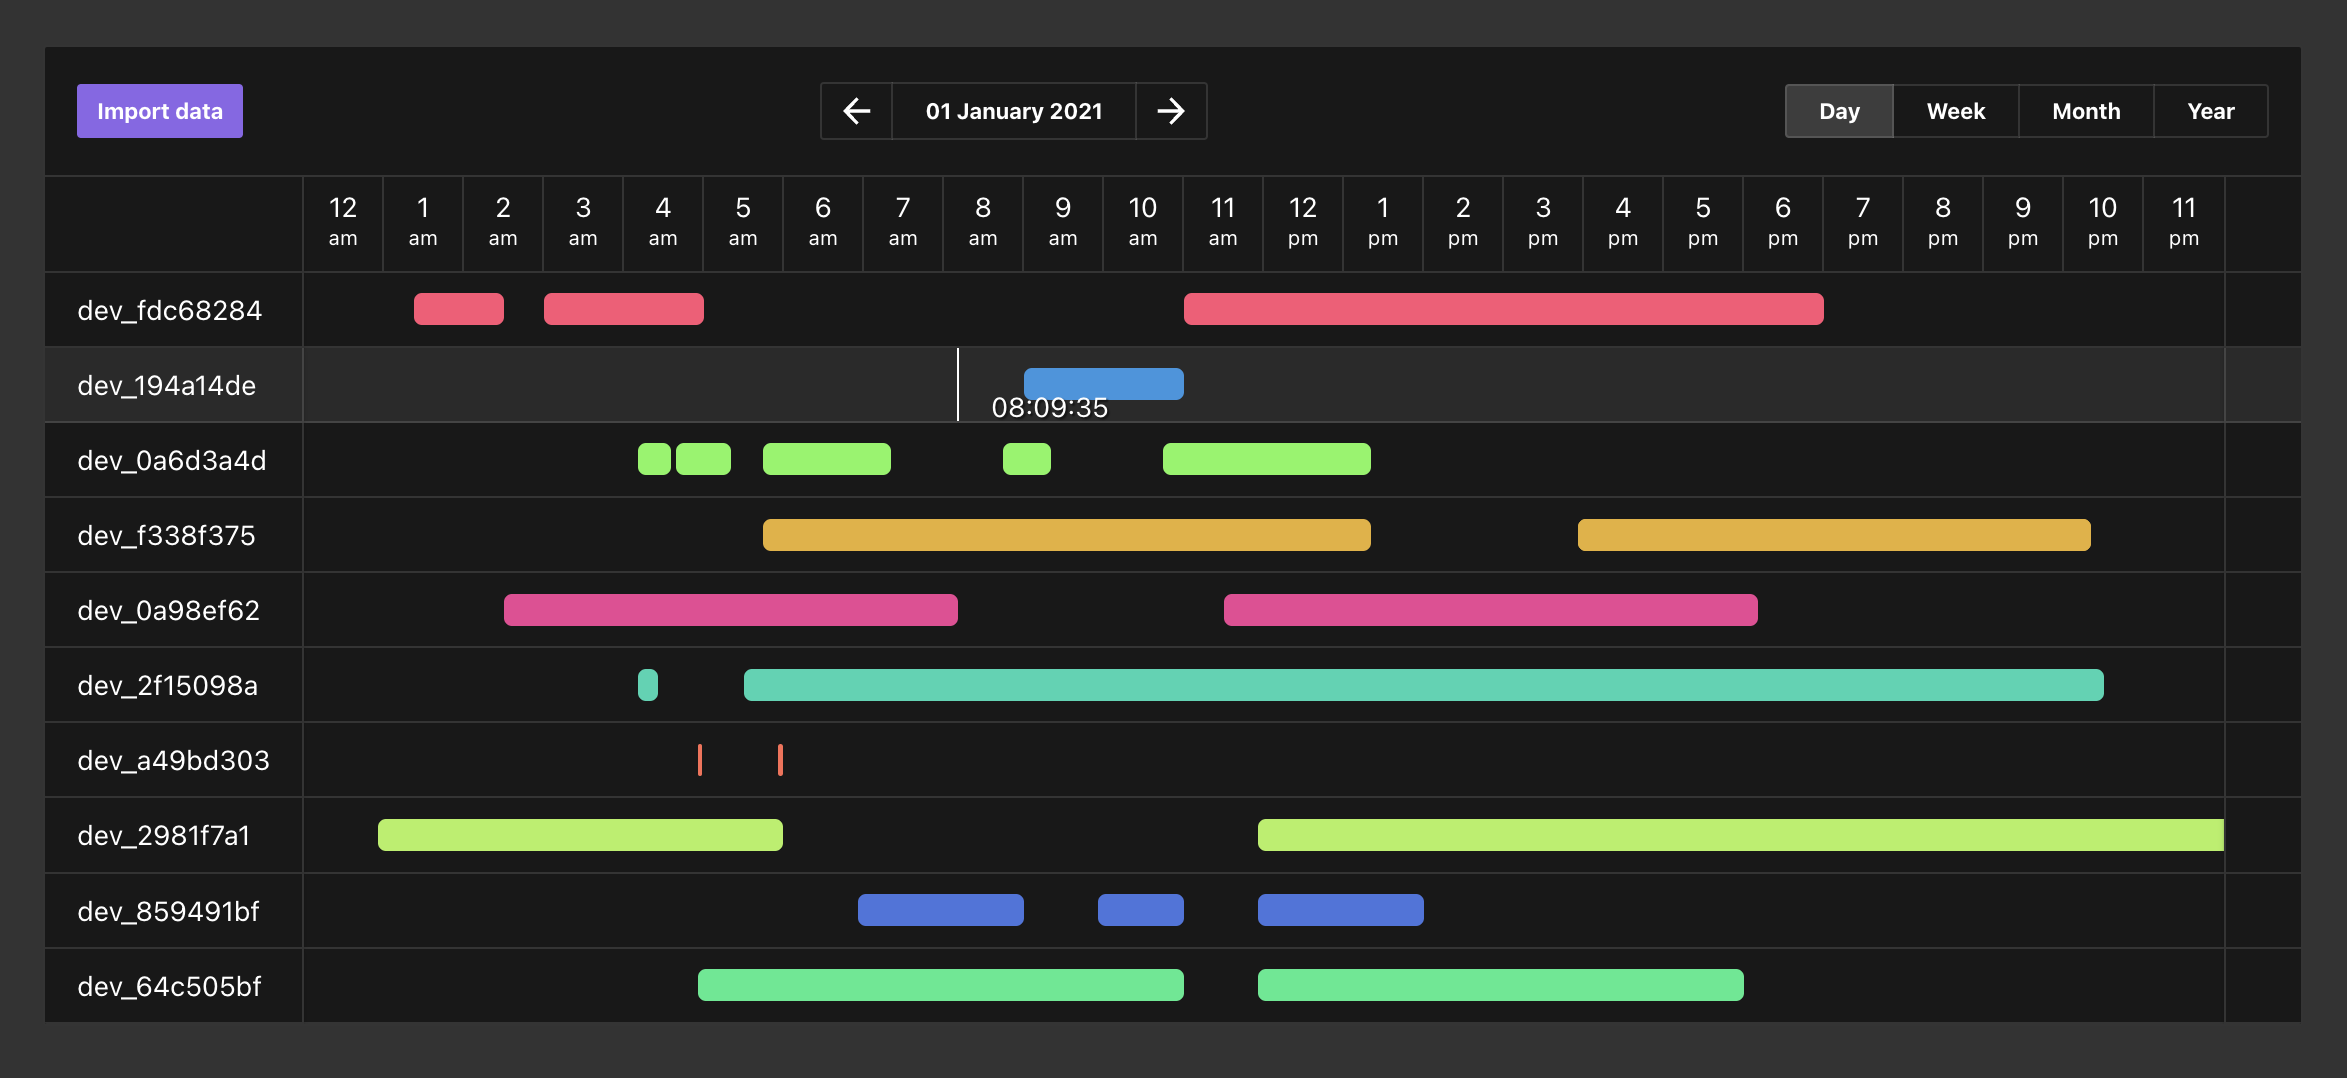
As a scalable data management service, Foxglove Data Platform is a convenient one-stop shop for storing and analyzing your robotics data. You can streamline your data management process – usually an extremely time-consuming and expensive part of development – and reserve your team’s focus for less routine parts of your workflows.
Foxglove Data Platform currently supports importing and exporting ROS 1 (.bag) files and MCAP (.mcap) files. Due to upstream ROS 2 limitations, Data Platform cannot meaningfully store ROS 2 (.db3) files, as they do not contain the message definitions necessary for proper introspection and analysis.
This isn’t to say Foxglove Data Platform is off-limits for your ROS 2 team – there are several ways you can convert your .db3 files into self-contained MCAP files.
The easiest way to achieve this is to install our rosbag2_storage_mcap plugin, and have your robots record MCAP files directly. But if you want to stick with your existing recording plugin, or have already-recorded ROS 2 data waiting to be analyzed, continue along with this tutorial to convert your ROS 2 data into MCAP files for proper storage and analysis.
Install the mcap CLI
For a user-friendly way to convert your ROS 2 files, download the mcap CLI tool for your platform – we currently support Linux, Windows, and macOS.
Check out the releases page to download the latest release binary, or install directly via your command line using go:
$ go install github.com/foxglove/mcap/go/cli/mcap@latest
Point to your custom message definitions
Next, you’ll need to specify to mcap where you store your ROS 2 message definitions.
Let’s say your msg files live in the /opt/ros/galactic directory. You’ll want to open up your setup bash file (i.e. /opt/ros/galactic/setup.bash) to set an environment variable called AMENT_PREFIX_PATH to your top-level ROS directory:
AMENT_PREFIX_PATH=/opt/ros/galactic
mcap will now know that it needs to search in /opt/ros/galactic to locate the ROS 2 message definitions on your hard drive, and to include those definitions when outputting your converted MCAP files.
Converting to MCAP
You’re now ready to convert your ROS 2 files into MCAP files!
Run the following command in your terminal to generate a MCAP file (e.g. my_output.mcap) from a local ROS 2 file on your computer (e.g. your_input.db3):
$ mcap convert your_input.db3 my_output.mcap
If you didn’t properly the AMENT_PREFIX_PATH environment variable in the previous step, you can even pass in your message definition directory paths as a command line flag:
$ mcap convert your_input.db3 my_output.mcap --ament-prefix-path=/opt/ros/galactic
If your message definitions live across multiple directories, use a colon-separated list of paths:
$ mcap convert your_input.db3 my_output.mcap --ament-prefix-path=/opt/ros/galactic;/another/directory/to/search
You should now be able to see a MCAP file output to your computer!
Run $ mcap info my_output.mcap to see what your shiny new file actually contains – you should see a print out of your data's message count, time range, channels list, and other relevant information:
$ mcap info my_output.mcap
  messages: 1606
  duration: 7.780758504s
  start: 2017-03-21T19:26:20.103843113-07:00
  end: 2017-03-21T19:26:27.884601617-07:00
  chunks:
          zstd: [14/14 chunks] (50.79%)
  channels:
          (0) /diagnostics              52 msgs   : diagnostic_msgs/DiagnosticArray [ros1msg]
          (1) /image_color/compressed  234 msgs   : sensor_msgs/CompressedImage [ros1msg]
          (2) /tf                      774 msgs   : tf2_msgs/TFMessage [ros1msg]
          (3) /radar/points            156 msgs   : sensor_msgs/PointCloud2 [ros1msg]
          (4) /radar/range             156 msgs   : sensor_msgs/Range [ros1msg]
          (5) /radar/tracks            156 msgs   : radar_driver/RadarTracks [ros1msg]
          (6) /velodyne_points          78 msgs   : sensor_msgs/PointCloud2 [ros1msg]
  attachments: 0
Congratulations on your first successful ROS 2 to MCAP conversion!
Uploading to Foxglove Data Platform
Now that you have your data in a format that Foxglove Data Platform understands, let’s get it imported so you can start tagging and analyzing your data with the rest of your team.
There are two ways to upload your data – through the Foxglove web console or with the foxglove-cli tool.
Web console
Create an account or sign in to your Foxglove account at app.foxglove.dev to view your dashboard.
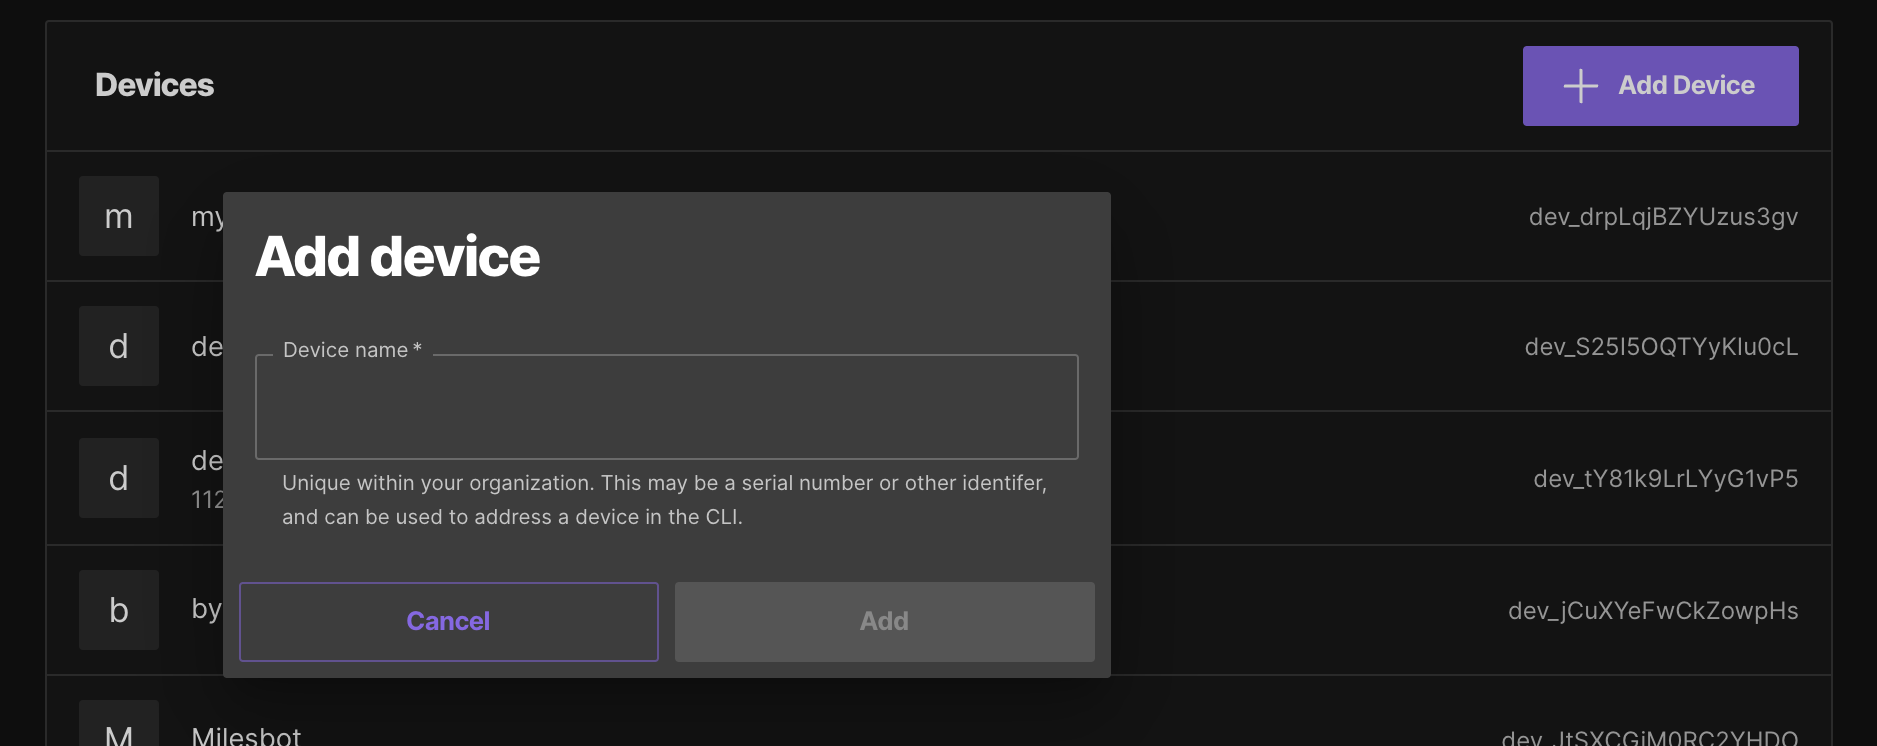
Before uploading your MCAP to Foxglove Data Platform, you must add the device that your data should be associated with – i.e. the robot that your data was recorded on. If you haven’t yet created the necessary device, click “Add device” at the top of the Devices page to create a uniquely named robot for your team to track.
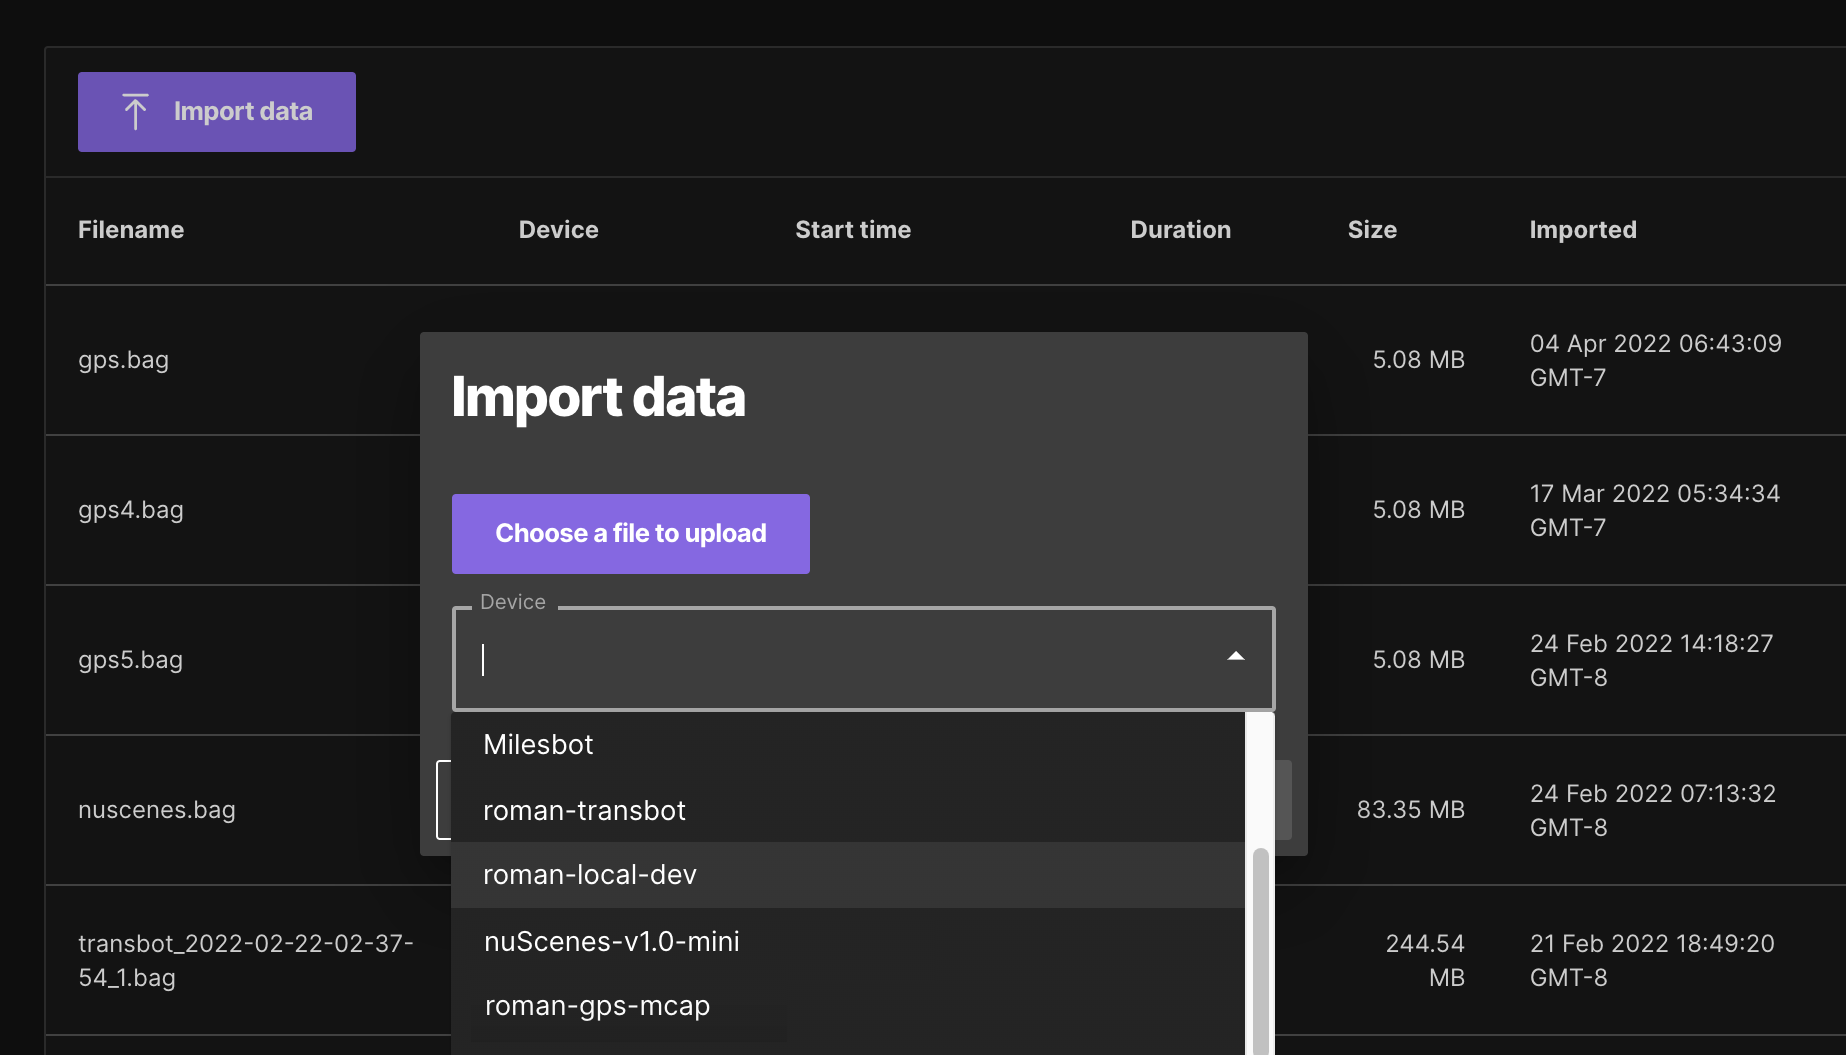
Next, click "Import data" on the Files page to start uploading your my_output.mcap file – be sure to associate it with your created device:
You should now be able to see your import on both the Files and Timeline pages! To see your data in the Timeline view, make sure you use the date picker to navigate to the time range in which your data was recorded:
foxglove-cli
Import your data with foxglove-cli if you want to write a script to automate or batch your imports. Install the latest release for your operating system and architecture, or install directly from source.
As with the web console, you must first authenticate yourself and add a device corresponding to your data:
$ foxglove auth login
$ foxglove devices add --name "Robot A"
  Device created: dev_drpLqjBZYUzus3gv
To upload your output MCAP file, run the following command:
$ foxglove data imports add my_output.mcap --device-id dev_drpLqjBZYUzus3gv
Alternatively, you can use the following shorthand to achieve the same results:
$ foxglove data import my_output.mcap --device-id dev_drpLqjBZYUzus3gv
To verify that your import succeeded, print out a list of all your imports:
$ foxglove data imports list
You should be able to locate an import with a device ID and filename that correspond to yours (i.e. dev_drpLqjBZYUzus3gv and my_output.mcap, respectively).
Continue to explore your data
Now that you’ve imported your ROS 2 data, you can leverage Foxglove Data Platform to better organize and analyze your team's data.
Attach rich metadata to your imported data, tag events of interest for your teammates, and submit hyper-specific queries to your data lake. Retrieve the information you need at lightning speed, with Data Platform's strategic data partitioning and indexing. You can even click a single button to stream a specific snippet of data into Foxglove Studio, for deeper visualization and debugging.
In short, this tutorial is just the start. Join us in our Slack channel if you have questions about getting started, or book a demo with our team to learn more about our active (and planned!) features.
Read more:
Write messages in the JSON or Protobuf format for easy visualization in Foxglove Studio
Esther WeonEsther Weon
Downloading Debian packages to set up ROS on your Linux machine
Esther WeonEsther WeonGet blog posts sent directly to your inbox.